

If you think building massive, sculpted arms requires a room full of heavy dumbbells, iron barbells, and expensive cable machines, think again. Thousands of lifters hit a growth plateau not from a lack of iron, but because their muscles have adapted to standard gravitational resistance.
Enter band curls.
Resistance band bicep curls are far more than a convenient travel fallback or home-workout substitute. They provide a unique mechanical phenomenon called accommodating resistance. Unlike free weights, where tension fluctuates depending on leverage and gravity, resistance bands demand more force the further you stretch them. This means your biceps experience peak tension right at the top of the curl—the exact point where traditional barbells start to unload.
In this comprehensive, deep-dive guide, you will learn the biomechanics, exact execution protocols, training variations, advanced fatigue techniques, and common mistakes to avoid so you can blow up your arms anywhere, anytime.
What Are Band Curls?
A band curl is an arm isolation exercise where elastic resistance (loop bands, tube bands with handles, or therapy bands) provides the load during elbow flexion.
As you curl your hands toward your shoulders, the band stretches, exponentially increasing the resistance precisely as your bicep reaches its shortest, most fully contracted state.
The Science of Accommodating Resistance: Why Bands Trigger New Growth
To understand why band curls build exceptional bicep height and detail, you have to look at how muscle loading differs between iron and rubber.
1. Matching the Bicep Contraction Curve
When curling a dumbbell standing up, the weight feels heaviest when your forearm is parallel to the floor (a 90-degree angle). Once you pass that midpoint and pull the dumbbell toward your shoulder, gravity pulls the weight down through your elbow joint, taking tension off the bicep belly.
With resistance bands, tension increases linearly as the band stretches. At peak contraction—when your muscle is squeezed tightly at the top—the band is under maximum stretch, delivering maximum tension where free weights fall flat.
2. Eliminating Joint Impact at the Stretched Position
The lowest position of a curl (when your arm is fully extended) is where your distal bicep tendon is most vulnerable to acute strains, especially under heavy free-weight loads. Resistance bands provide minimal resistance at full lockout and smoothly scale up tension as you curl upward, keeping your tendons safe while torching the muscle fibers.
3. Explosive Acceleration & Motor Unit Recruitment
Bands force you to accelerate through the movement. Because resistance increases as you curl higher, you cannot rely on momentum to sling the weight up. Your central nervous system is forced to recruit fast-twitch muscle fibers throughout the entire range of motion.
4. Constant Time Under Tension (TUT)
Unlike dumbbells, which allow brief rest moments at the bottom (hanging) or top (stacked joint) of a curl, a taut resistance band maintains active, elastic pull every single millisecond of the rep. This prolonged time under tension signals deep cellular metabolic stress—one of the key drivers of sarcoplasmic hypertrophy.

Anatomy Breakdown: What Muscles Do Band Curls Target?
Understanding the muscular anatomy of your upper arm lets you tweak your band grip, stance, and anchor angles to target specific areas for complete arm development.
1. Biceps Brachii (Long Head & Short Head)
- Long Head (Outer Bicep): Located on the lateral (outer) side of the arm. Responsible for creating the vertical height or “bicep peak.” Using a narrower grip or hammer stance on the band shifts load straight to the long head.
- Short Head (Inner Bicep): Positioned on the medial (inner) arm. Gives the bicep width, thickness, and density when viewed from the front. A wider stance on the band or outward hand rotation emphasizes the short head.
2. Brachialis
Lies beneath the lower bicep belly and acts as a pure elbow flexor. Developing this muscle physically pushes your biceps higher, adding substantial side-profile arm thickness and separating the bicep from the tricep.
3. Brachioradialis
The main muscle running along the top outer portion of your forearm, heavily engaged when using neutral-grip band hammer curls to give your arms a complete, powerful look.
Step-by-Step Execution: How to Perform Perfect Band Curls
Doing band curls effectively requires controlled intent. Because there are no heavy iron plates to balance, you must focus entirely on mind-muscle connection and controlled tempo.
Step 1: Secure the Band Beneath Your Feet
Stand on the center of a loop or tube resistance band with your feet shoulder-width apart for a stable base.
- Tension Tip: Stepping wider creates more starting tension; a narrower foot stance lowers the resistance.
Step 2: Set Your Grip and Lock Shoulder Blades
Grasp the band ends or handles with an underhand (supinated) grip. Stand tall, pull your shoulder blades down and back (depress your scapula), and pin your elbows firmly against your side ribs.
Step 3: Curl Upward and Accelerate
Exhale as you squeeze your biceps to drive your hands toward your shoulders. Focus on accelerating through the band’s increasing stretch while keeping your elbows completely anchored in place.
Step 4: Hold the Peak Contraction
Once your hands reach shoulder level, hold the peak contraction for 1 to 2 full seconds. Flex your biceps intentionally against the maximum band pull.
Step 5: Control the Return Stretch (The Eccentric Phase)
Inhale and lower your hands slowly over a 3-second tempo. Do not let the band snap your arms back down—fight the elastic pull all the way to bottom lockout to maximize muscle fiber damage.
5 Essential Band Curl Variations Every Lifter Should Use
Changing your anchor point and hand orientation transforms how the band loads your arms, allowing you to build well-rounded bicep size.
| Variation | Anchor Setup | Primary Target | Key Hypertrophy Benefit |
| Standing Supinated Band Curl | Under feet | Biceps Brachii (Both heads) | Maximum stretch-to-squeeze resistance profile |
| Band Hammer Curl | Under feet (Neutral grip) | Brachialis & Brachioradialis | Builds massive forearm and lower bicep thickness |
| High Door-Anchored Band Curl | High door frame | Long Head & Bicep Peak | Replicates cable overhead curls for intense isolation |
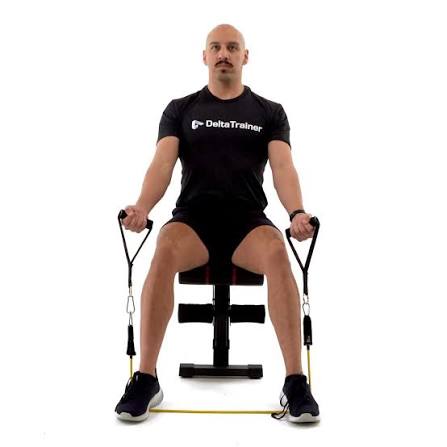
| Seated Band Preacher Curl | Under feet while seated | Isolated Biceps Brachii | Completely eliminates torso swing and momentum |
| Band Drag Curl | Under feet (Elbows driven back) | Outer Long Head | Forces 100% bicep activation with zero front-delt cheat |
Advanced Fatigue Techniques for Maximum Muscle Hypertrophy
Because bands are safe on the joints, they are the single best tool for high-intensity fatigue protocols that drive dense muscle hypertrophy.
1. Mechanical Stance Drop Sets
Start a set with your feet wide on the band (maximum tension). Rep out to complete failure. Immediately step your feet closer together (reducing tension by 20–30%) and continue repping out to failure without resting.
2. Iso-Hold Burnouts
Curl the band to peak position and hold a static contraction at the top for 10 seconds. Immediately perform 10 full reps. Repeat the hold for 5 seconds, followed by another 5 rapid reps.
3. Band 21s Protocol
- Perform 7 reps strictly in the bottom-to-mid range of the motion.
- Perform 7 reps strictly from the midpoint up to full peak squeeze.
- Perform 7 full-range-of-motion reps to finish off the set.
5 Critical Mistakes That Ruin Your Band Results
Complete High-Tension Band Bicep Workout Routines
Option A: Complete Standalone Band Arm Blast
Perform this standalone session to pack mass onto your arms without heavy iron.
- Standing Supinated Band Curl: 4 sets x 12–15 reps (60 sec rest) — Focus: 2-second hold at top squeeze
- Seated Band Preacher Curl: 3 sets x 10–12 reps (60 sec rest) — Focus: Strict isolation
- Band Hammer Curl: 3 sets x 15–20 reps (45 sec rest) — Focus: Brachialis density
- High Door-Anchored Overhead Curl: 3 sets x 12–15 reps (45 sec rest) — Focus: Peak height
- Mechanical Stance Drop Set: 2 sets x Failure (Step feet inward twice per set)
Option B: High-Volume Pull-Day Finisher
Ideal to torch your biceps at the end of a back-and-biceps workout.
- Standing Band Curl: 3 sets x 15, 12, 10 reps (Widening foot stance each set)
- Final Burnout Set: 1 set x 20 reps + Iso-Hold at the top until complete failure.
Frequently Asked Questions (FAQs)
Can you build big biceps with only resistance bands?
Yes! Progressive resistance, metabolic stress, and muscle damage drive growth. By using thicker bands, increasing your reps, controlling eccentric negatives, and applying drop sets, bands trigger the same mechanical hypertrophy signals as free weights.
How do I make band curls harder without buying new bands?
You can easily increase difficulty by widening your foot stance, slowing down your lowering phase (4-second negatives), holding peak contractions longer, or doubling up two loop bands together.
Are band curls better for your joints than barbell curls?
In many cases, yes. Resistance bands put far less torque on your wrists, elbows, and lower back while offering smooth, joint-friendly loading that adapts to your natural biomechanics.
Summary
Band curls are a powerful tool for modern arm training. By tapping into accommodating resistance, locking in strict elbow positioning, and mastering controlled eccentrics, you can build thick, peaked, and resilient biceps anywhere.
Ditch the excuse that you need a fully equipped gym to build great arms. Grab a resistance band, focus on the peak squeeze, and start growing.
#30DayArmChallenge #BandCurls #ResistanceBands #BicepWorkout #ArmDay #HypertrophyTraining #BodybuildingTips #BicepPeak #GymMotivation #FitLife #StrengthTraining #ArmWorkout #BicepGrowth #FitnessGoals #GymTips #HomeWorkout #MuscleBuilding #IsolationTraining #PullDay #UpperBodyWorkout #ExerciseForm #FitFam #GymLife #WorkoutRoutine #WeightLifting #BicepsBrachii #Brachialis #FitnessGuide #PersonalTrainer #BicepPump
